Quick Start
This guide will help you get up and running quickly with the Honeybee-PH toolkit for Rhino / Grasshopper. The Honeybee-PH toolkit is designed to allow users to add Passive House style data to their Honeybee models, and then export those models out to the Passive House modeling platforms WUFI-Passive and PHPP.
The simplest usage of the Honeybee-PH toolkit is demonstrated below. For detailed tutorials on full Passive House modeling and the use of all the new Honeybee-PH tools, check out Learn More.
1. Create the HB-Model
To get started, we’ll need a valid Honeybee model to work with. You can use any model you like, but in order to keep things simple for this first example we’ll start with just a very basic box. We will create this simple model using normal Grasshopper geometry tools and standard Honeybee components. We are not using any of the new Honeybee-PH tools yet.
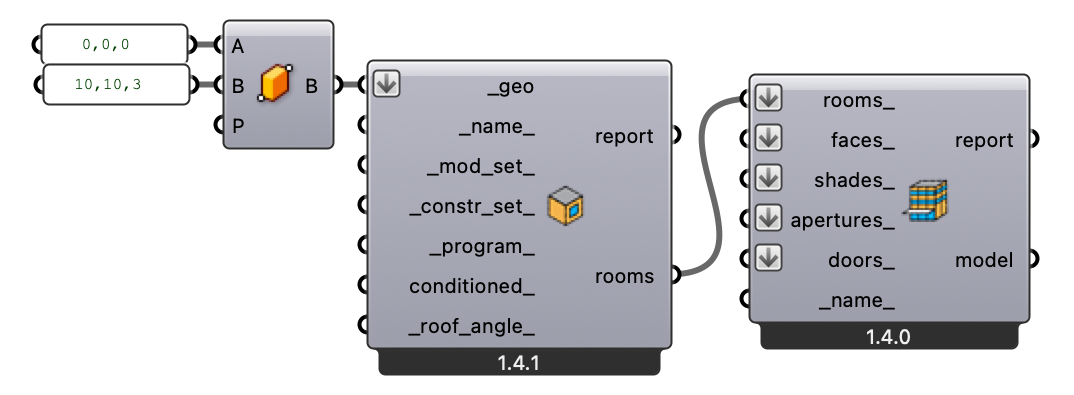
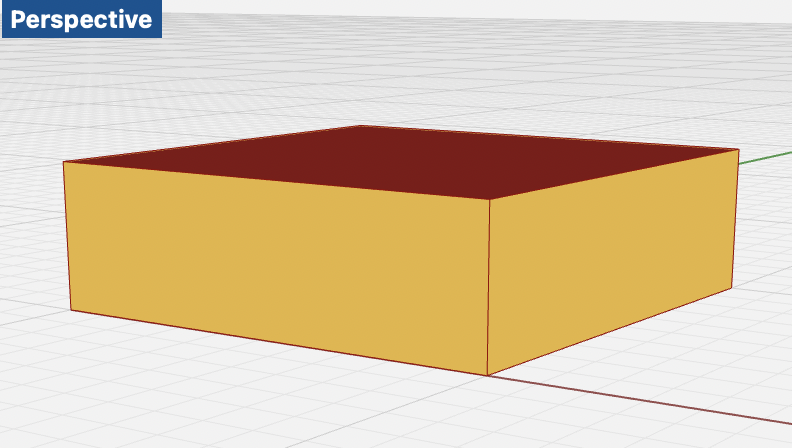
If we preview the Honeybee model at this point, we should see nothing more than a simple box with 4 sides, a roof and a floor:
2. HB-Model > HBJSON
At this point, we have a valid Honeybee-Model. Our next step is to write out the Honeybee Model to an HBJSON file. Here we can also use just the standard “HB Dump Objects” Honeybee Component. As before, we are not using any of our new Honeybee-PH tools yet. This is all still basic Honeybee.

3a. HBJSON > WUFI-Passive
Now it is finally time to use some of the new Honeybee-PH tools. If we would like to pass our Honeybee Model off to WUFI-Passive, we can use the new “HBPH - Write WUFI XML” Honeybee-PH Grasshopper component. This component will read in the HBJSON model file, rebuild the Honeybee model, and then convert it over to a new WUFI-XML document. This new WUFI-XML document is being saved to the Desktop in the example shown here, but you can save this file anyplace you like.

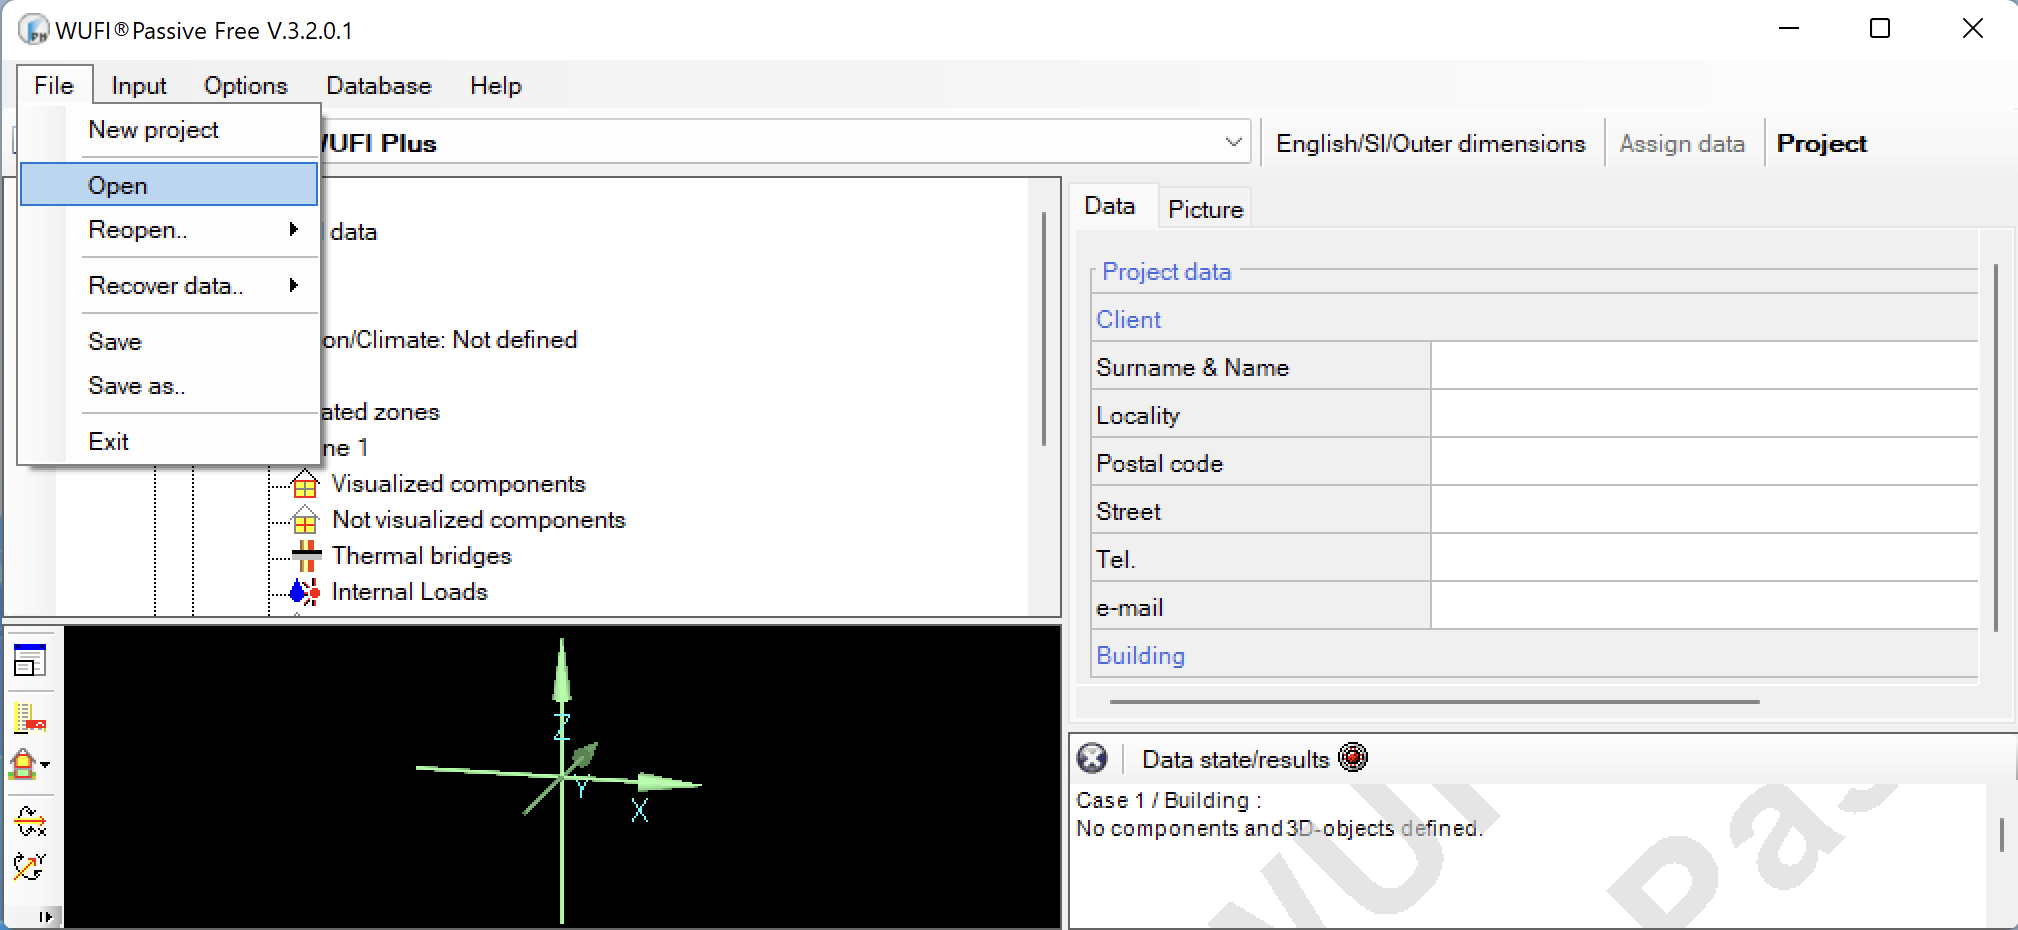
This newly created WUFI-XML document can now be opened by just using the WUFI-Passive software. Fist, open WUFI-Passive on your system and go to “File / Open…”
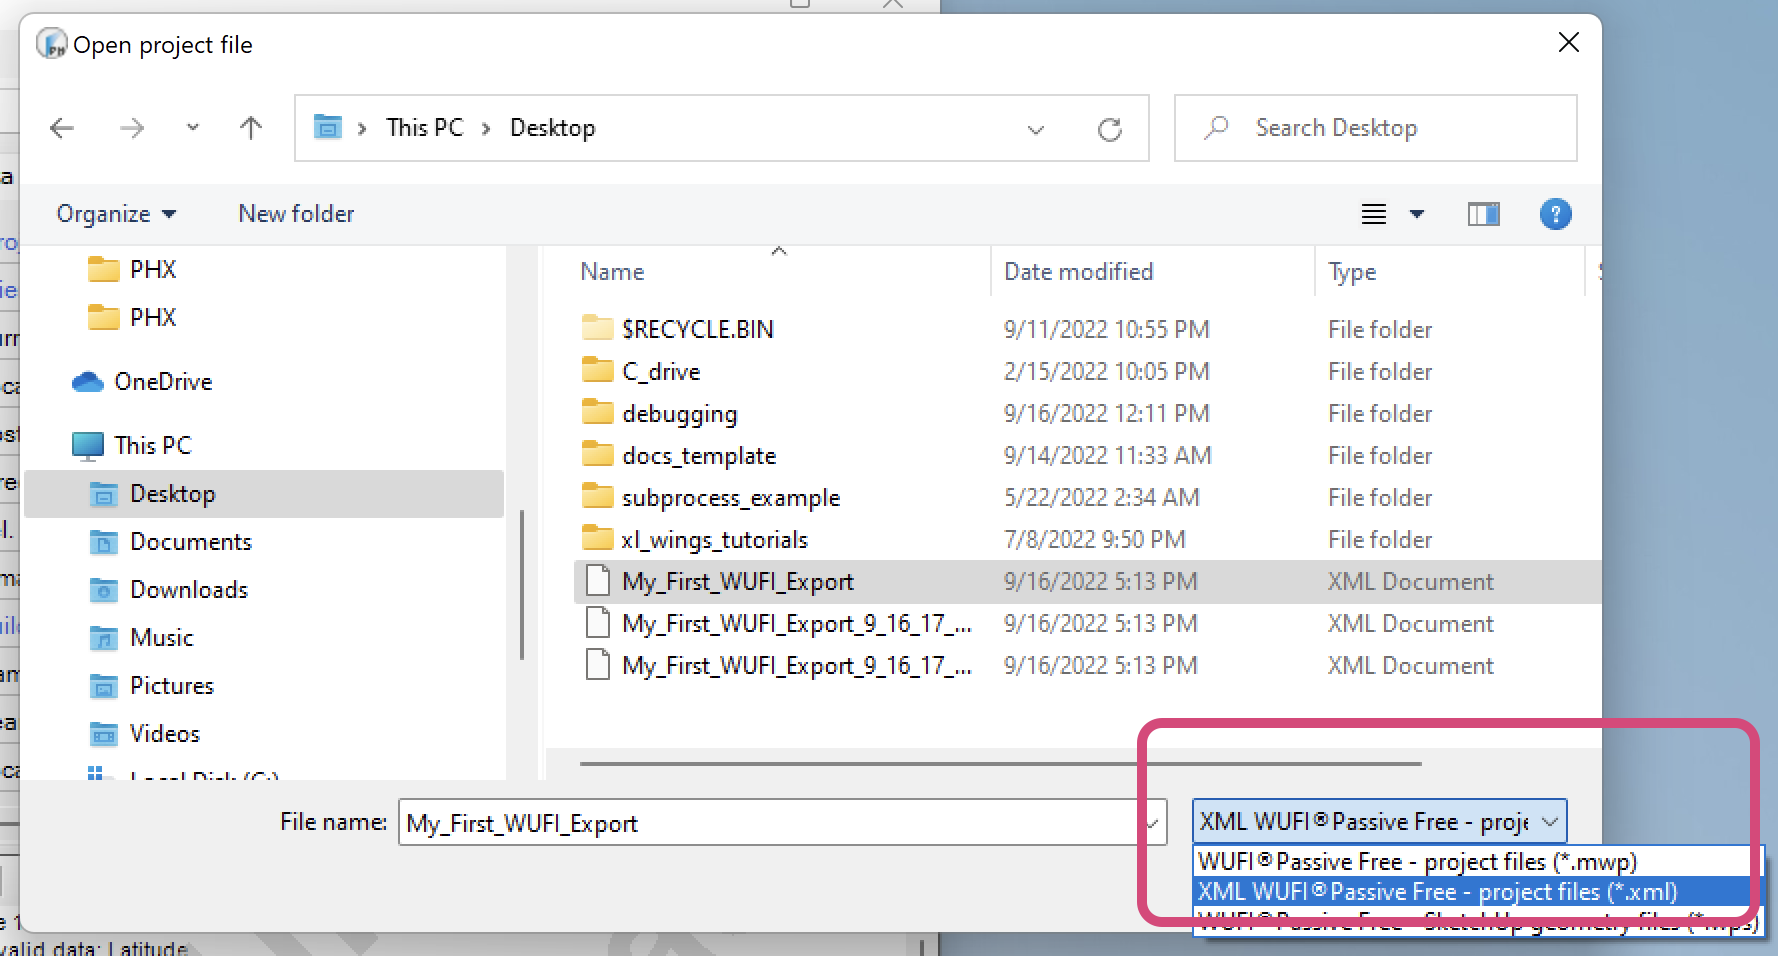
Navigate to the folder where you saved the new WUF-XML file we just created in Grasshopper, and select it. If you don’t see your new file in the list, make sure you are looking for *.xml files.
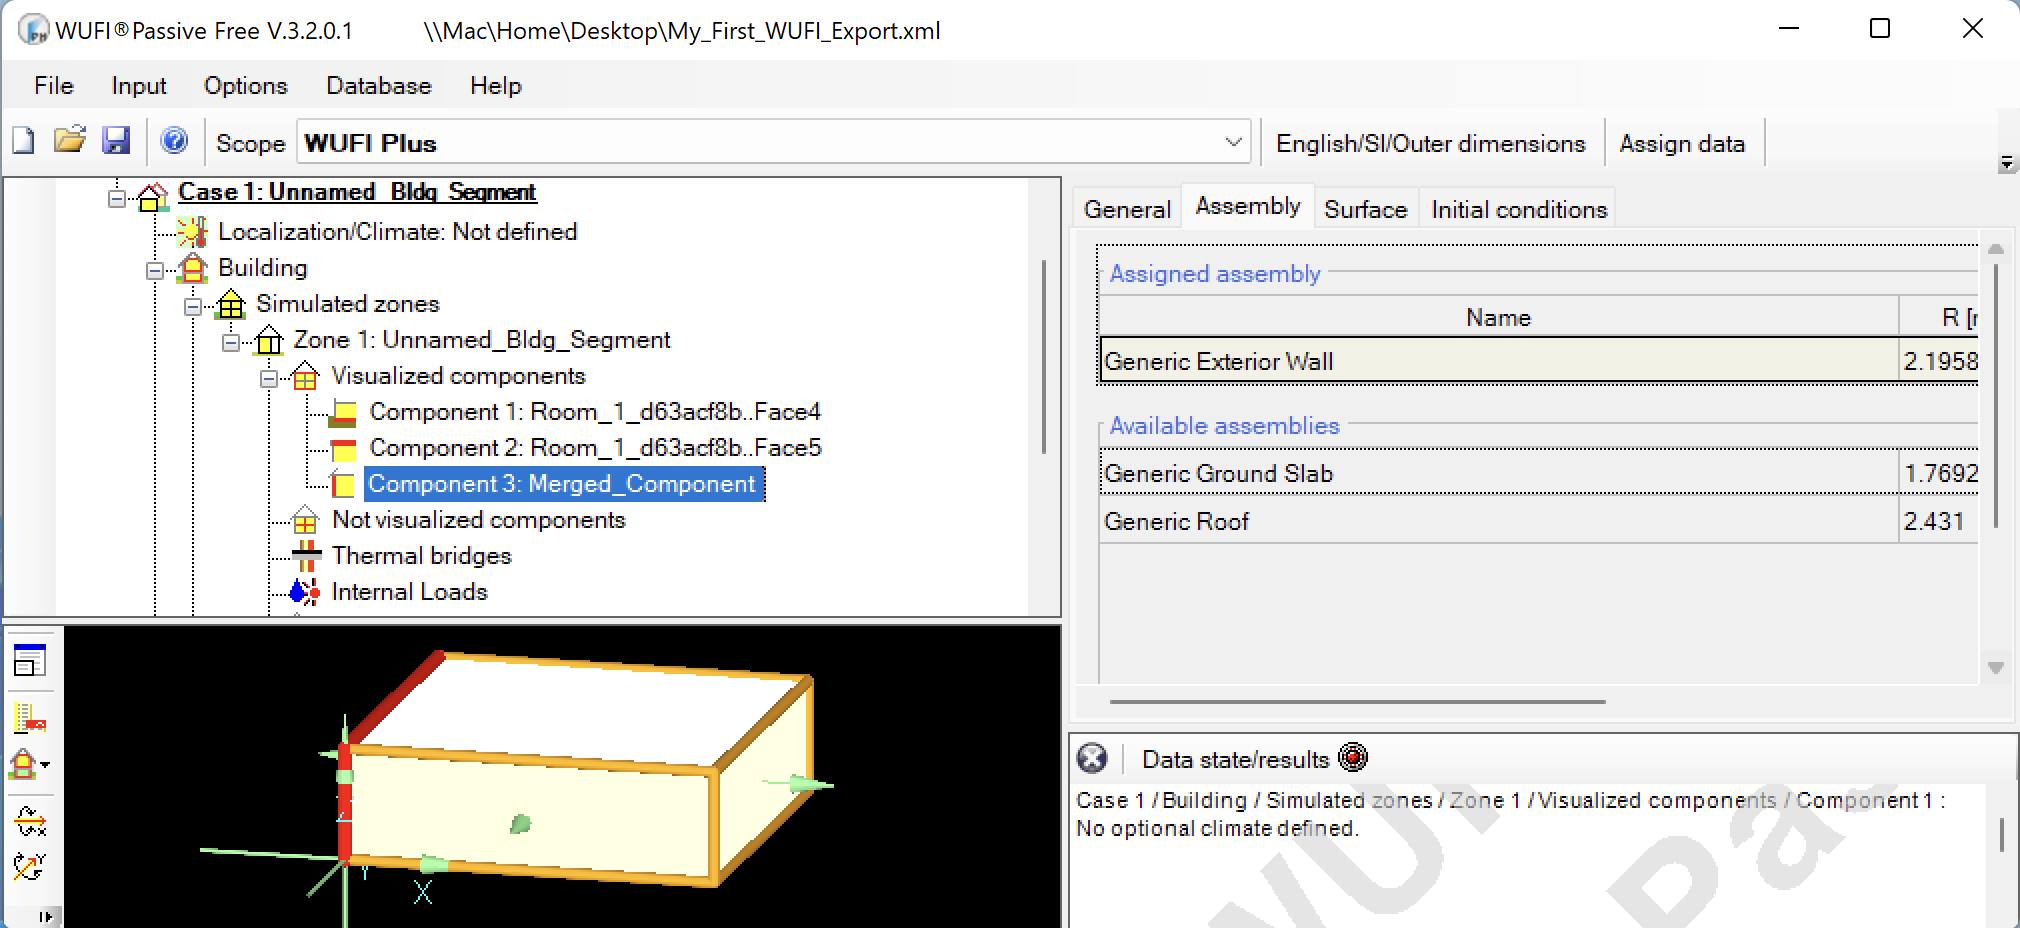
Select the right file, click “Open”, and if everything worked you should now see your Honeybee model geometry appear in the WUFI preview panel.
3b. HBJSON > PHPP
If we want to export our Honeybee Model to the Passive House Planning Package (PHPP) the process is similar, but since the PHPP is a Microsoft Excel workbook, we will use a slightly different Honeybee-PH tool. The most important difference between the PHPP export and the WUFI-Passive export is that when writing out the Honeybee-Model data to PHPP, the ’target’ PHPP file must be open at the same time as our Grasshopper file. To get started using our example Grasshopper file above, simply open up a valid blank PHPP document alongside the Rhino / Grasshopper window.
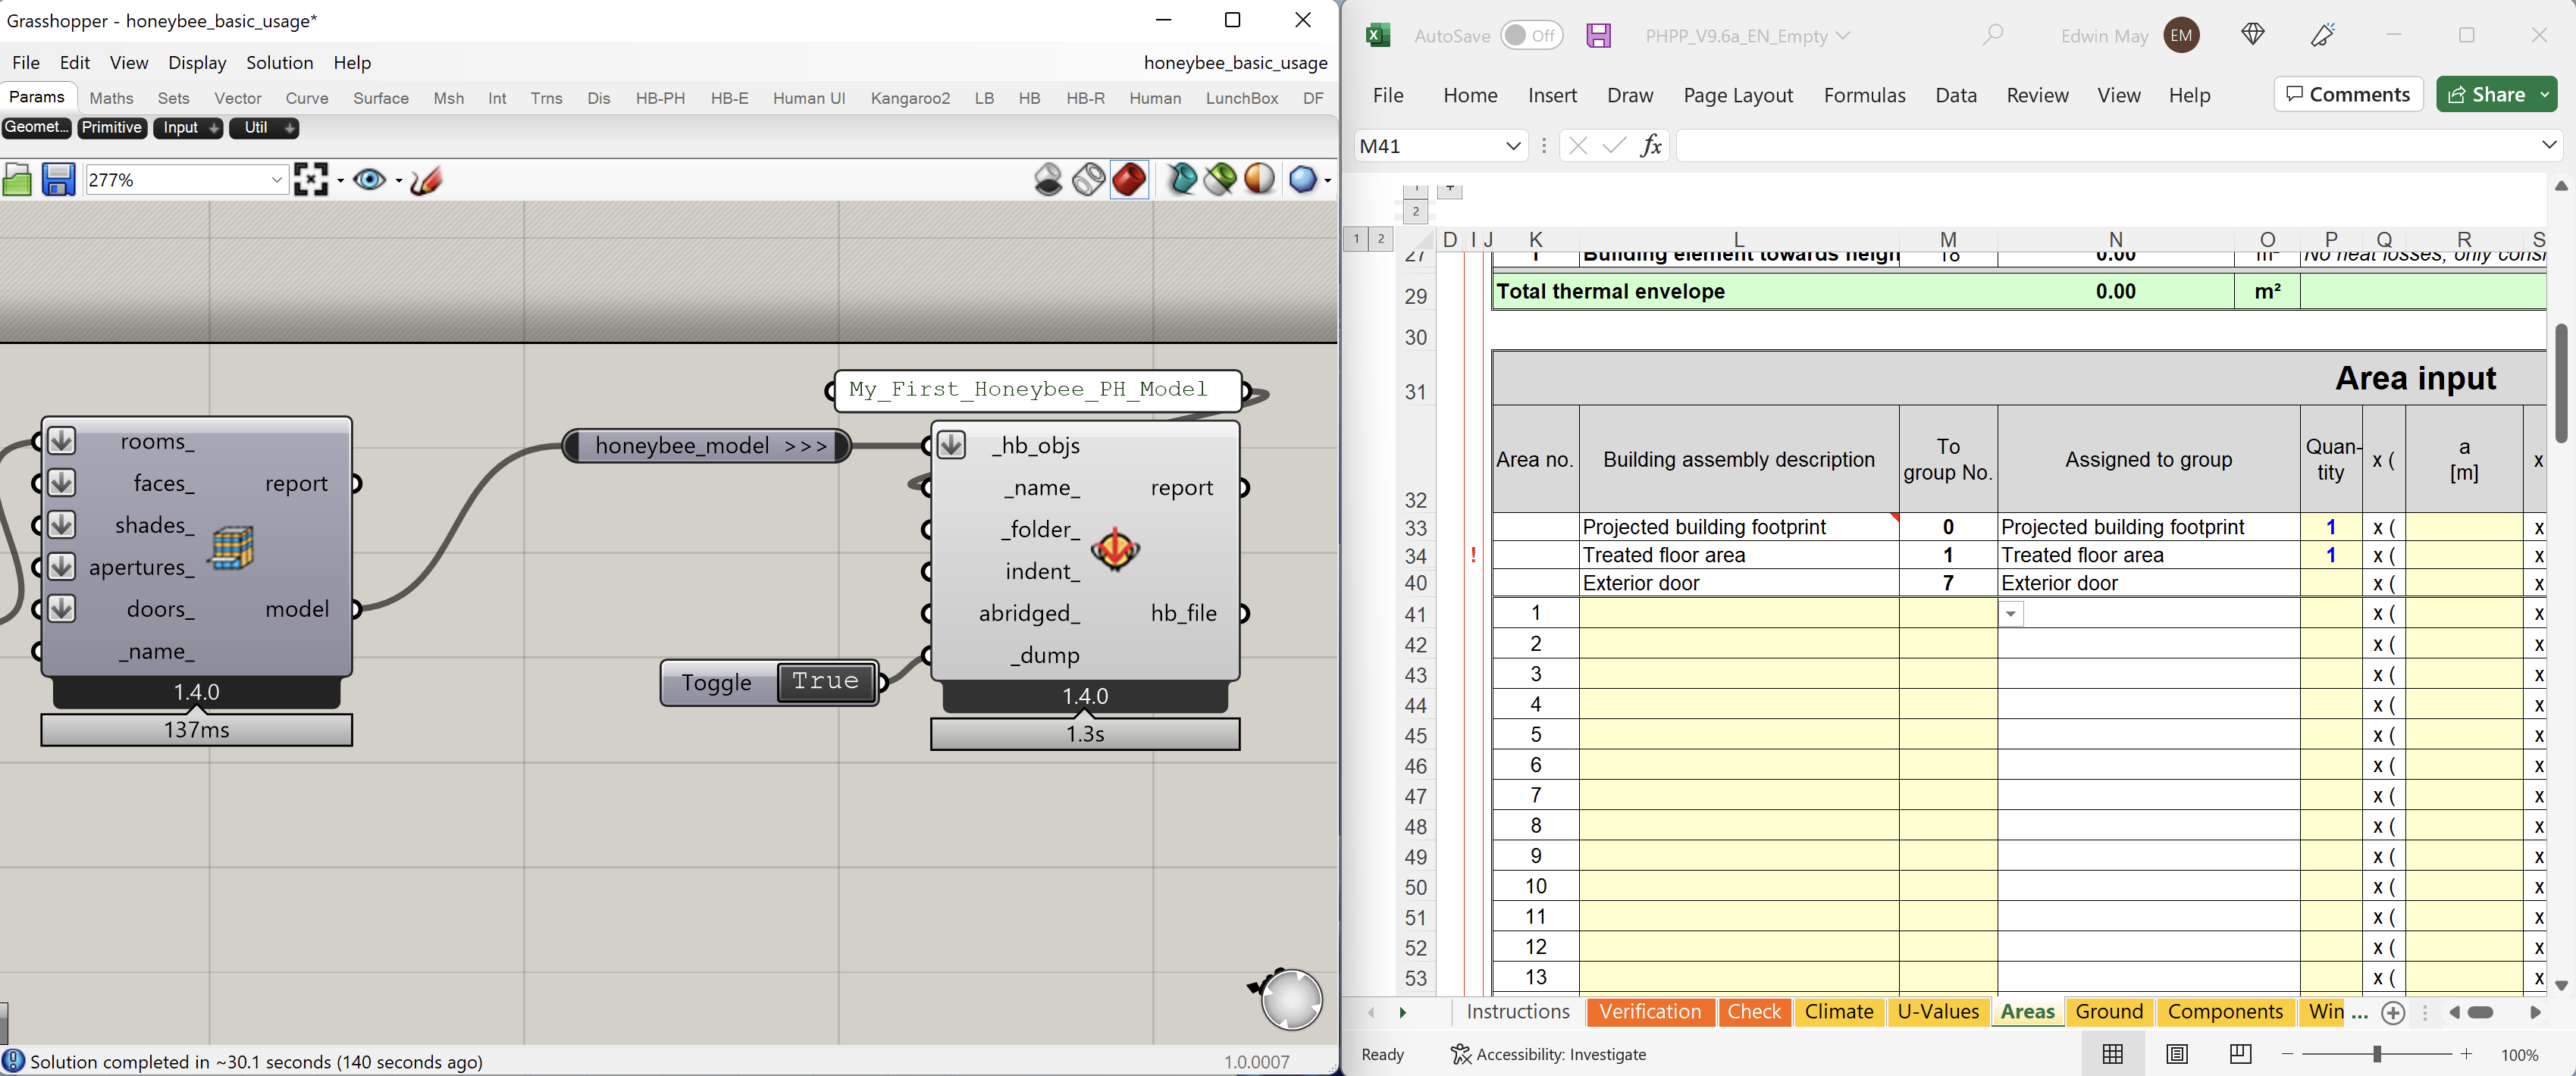
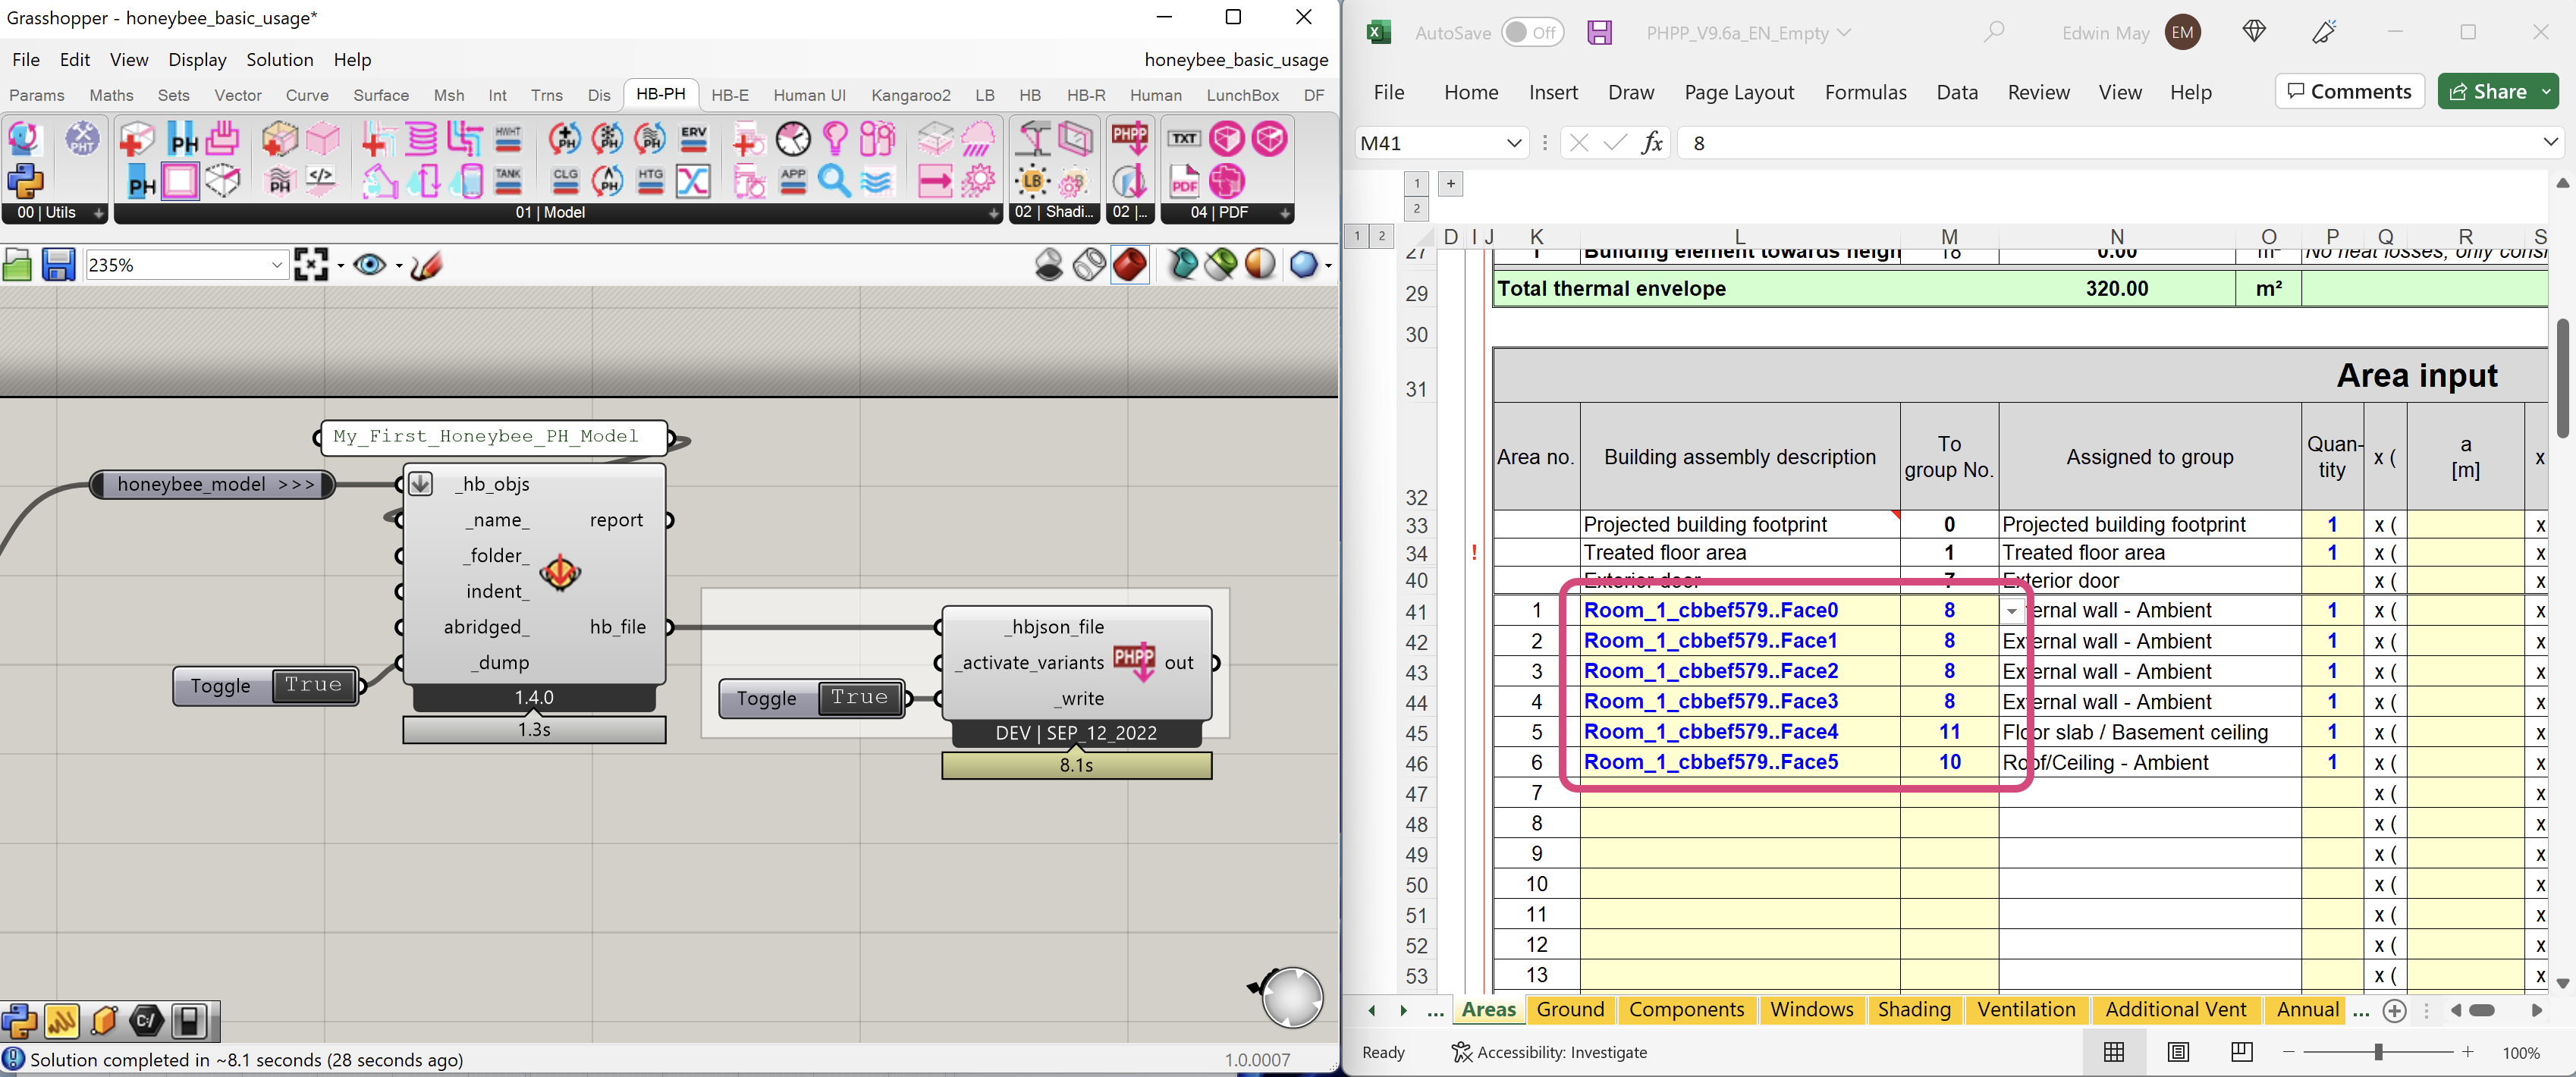
With both the Grasshopper file, and the PHPP Excel file open at the same time, we can now use the new Honeybee-PH “HBPH - Write to PHPP” component to write out the data to the Excel file. Note that this component will automatically write to the ‘Active’ excel document, so if you are having trouble, try closing any excel documents other than the one you are trying to write to. If everything worked, you should see your model data show up in the PHPP.
Next Steps
The example above is the most basic model possible, with the absolute minimum amount of additional geometry and additional attribute assignments. At this point, you can certainly just use the normal Passive House modeling tools to finish off your model and add additional detail.
However, in order to create a full Passive House model using the Honeybee-PH toolkit you’ll want to add in all the additional data about your building directly to our Grasshopper definition. The Honeybee-PH toolkit has lots of new tools to help you model everything from windows to mechanical systems to thermal-bridges, all directly in your Grasshopper scene. Lots more information on the usage of these detailed components can be found in the Learn More section.

